Ubuntu
- Quick And Dirty
- Docker
- mount
- Cockpit on Ubuntu
- Installer Dialog
- Automatische Updates
- Updates
- Systemd Journal Logs
Quick And Dirty
Bestimmte Ports an eine andere IP-Adresse weiterleiten
Zuerst werden die Forwarding-Funktionalitäten aktiviert:
sudo sysctl net.ipv4.ip_forward=1
… und dann die entsprechende Weiterleitungsregel in die IPtables geschrieben:
sudo iptables -t nat -A PREROUTING -p tcp --dport 5222 -j DNAT --to-destination 2.2.2.2:5222
In dieser Beispielregel wird der TCP-Port 5222 der lokalen Maschine (XMPP Client Port) auf denselben Port eines Servers mit der IP-Adresse 2.2.2.2 weitergeleitet.
Jetzt noch Masquerading aktivieren und die Weiterleitung steht:
sudo iptables -t nat -A POSTROUTING -j MASQUERADE
Timezone
sudo timedatectl set-timezone Europe/Berlin
timedatectl
timedatectl list-timezones
Docker
install docker on ubuntu
sudo apt install docker.io docker-compose
mount
sudo blkidsudo nano /etc/fstabUUID=03ec5dd3-45c0-4f95-a363-61ff321a09ff /media/works ext4 defaults 0 0Cockpit on Ubuntu
How to install Cockpit
How to install Cockpit
Log into your Ubuntu Server instance and issue the command:
sudo apt-get install cockpit -y
Once the installation completes, start and enable Cockpit with:
sudo systemctl enable --now cockpit.socket
Now that Cockpit is installed and running, you can log in. However, depending on how your system is set up, you’ll want to make sure the user you log into Cockpit with has sudo privileges. For that, you would issue the command:
sudo usermod -aG sudo USER
Where USER is the name of the user in question.
Just for fun, we’ll add container support to our instance just to show how easy it is. From the terminal window, issue the command:
sudo apt-get install podman cockpit-podman -y
Start and enable Podman with:
sudo systemctl enable --now podman
How to log into Cockpit
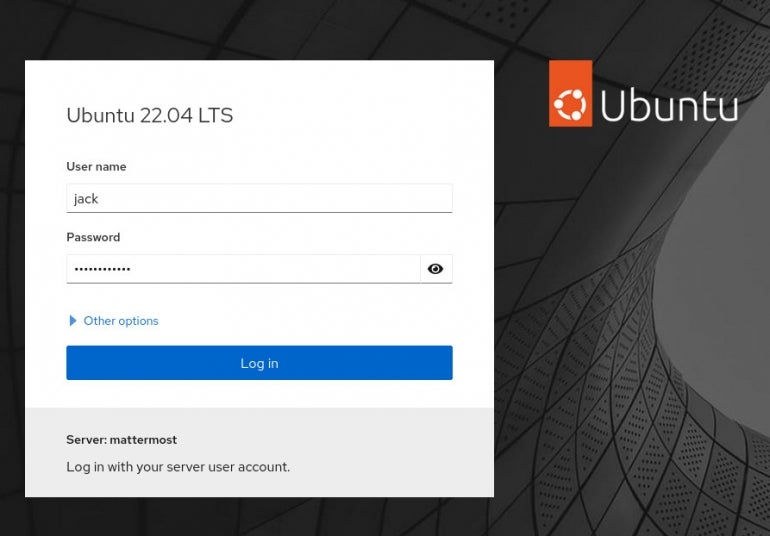
Open a web browser and point it to https://SERVER:9090. You should be greeted by the login screen (Figure A).
Figure A
If you find that the firewall isn’t allowing you through, but you can enable the correct port with the following:
sudo ufw allow 9090
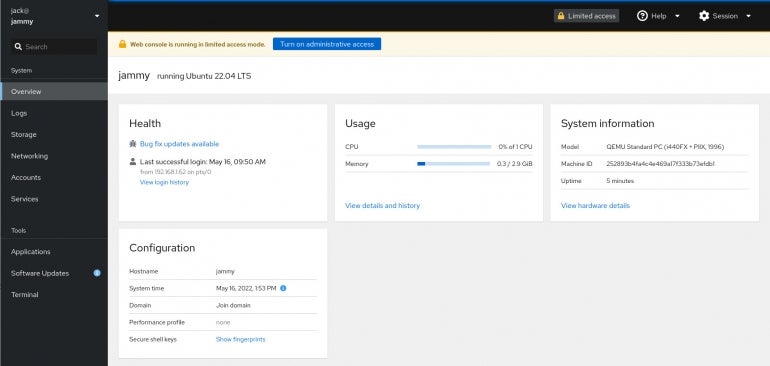
Upon logging in, you will see that the web console is running in limited access mode (Figure B).
Figure B
We need to grant heightened access to our user.
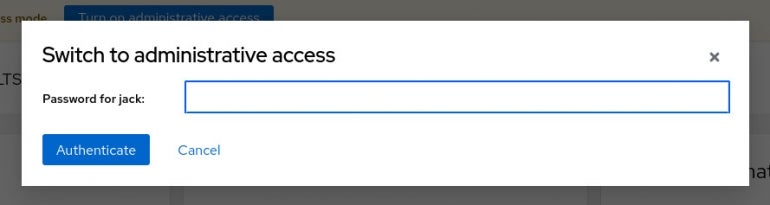
Click Turn On Administrative Access. Then, when prompted (Figure C), type your user’s password to grant administrative access.
Figure C
Installer Dialog
subiquity
sudo snap install subiquity
sudo snap refresh --edge subiquity
Automatische Updates
https://wiki.ubuntuusers.de/Aktualisierungen/Konfiguration/
GUI
In der Aktualisierungsverwaltung gibt es einen Dialog, in dem sich zahlreiche Einstellungen rund um die Paketverwaltung finden. Dort muss unter "Wenn Sicherheitsaktualisierungen verfügbar sind:" die Auswahl zu "Automatisch herunterladen und installieren" gesetzt werden, sofern diese nicht schon bereits voreingestellt ist.
unattended-upgrades
Die automatische Installation der Updates wird von unattended-upgrades übernommen:
-
unattended-upgrades
Befehl zum Installieren der Pakete:
sudo apt-get install unattended-upgrades
Oder mit apturl installieren, Link: apt://unattended-upgrades
Während der Installation kann das gewünschte Verhalten entsprechend konfiguriert werden. Möchte man es nachträglich ändern, verwendet man den Befehl:
sudo dpkg-reconfigure -plow unattended-upgrades
Logdateien werden im Verzeichnis /var/log/unattended-upgrades/ gespeichert. Sollte versucht werden, den Computer herunterzufahren, während unattended-upgrades arbeitet, verzögert der gleichnamige Dienst dies so lange wie nötig, so dass das Herunterfahren länger dauert. Dies ist wichtig, damit keine unvollständig installierten oder konfigurierten Pakete hinterlassen werden.
Um unattended-upgrades manuell (ohne #GUI) zu aktivieren, muss man die Datei /etc/apt/apt.conf.d/10periodic bearbeiten oder anlegen, [5], sodass sie mindestens diese Einträge enthält:
APT::Periodic::Update-Package-Lists "1";
APT::Periodic::Download-Upgradeable-Packages "1";
APT::Periodic::Unattended-Upgrade "1";
Experten-Info:
Der Parameter für APT::Periodic::Unattended-Upgrade gibt an, in welchem Zeitintervall (in Tagen) die automatische Update-Installation durchgeführt werden soll. 0 bedeutet "deaktiviert". Die Einstellungen werden in die Datei /etc/apt/apt.conf.d/20auto-upgrades geschrieben.
In der Datei /etc/apt/apt.conf.d/50unattended-upgrades befinden sich noch weitere Einstellungen. Wer einen Mailserver und das Programm mailx (bspw. aus dem Paket bsd-mailx) installiert hat, kann sich so z.B. auch nach jedem Update oder nur bei Fehlern per Mail benachrichtigen lassen, alternativ kann auch eine lokale Nachricht an einen Benutzer versendet werden.
Nicht nur Sicherheits-Updates
weitere Infos unter dem Link oben
Updates
sudo apt update
sudo apt autoremove
sudo apt clean
deborphan # Install this package management tool with sudo apt install deborphan
sudo reboot
deborphan ist ein Programm, das auf einem Debian System nach verwaisten Paketen sucht. Wird ein Paket gefunden, von dem keine anderen Pakete abhängig sind, so wird der Name ausgegeben. Dies ist hauptsächlich sinnvoll, um installierte Bibliotheken zu finden, die nicht mehr benötigt werden.
Die angezeigten Pakete können nun mit den üblichen Tools entfernt werden. Wenn die Liste zunächst genau kontrolliert wurde (um zu verhindern, dass noch benötigte Pakete versehentlich gelöscht werden), können die nicht benötigten Pakete mit dpkg --purge `deborphan` oder dpkg --purge `deborphan --guess-all` oder auch
apt-get --purge remove `deborphan`
gelöscht werden.
Systemd Journal Logs
Free up Disk Space – Clear Systemd Journal Logs
Free up Disk Space – Clear Systemd Journal Logs in Ubuntu 20.04
Going to free up Ubuntu system disk space? Try clearing the systemd journal logs, it may free up a few GB of space.
By using the Disk Usage Analyzer tool, I found that /var/log/journal takes more than 4 GB system space in my Ubuntu 20.04.
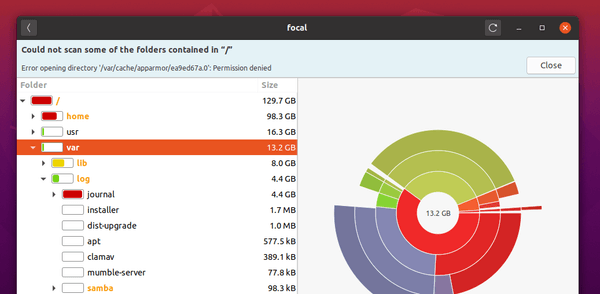
Systemd has its own logging system called the journal, and the log files are stored in /var/log/journal. As long as I don’t need the logs for any debugging, it’s safe to delete these files. And following steps will show you how.
1. First open terminal from system app launcher, and you may run command to check out the current disk usage of all journal files:
journalctl --disk-usage
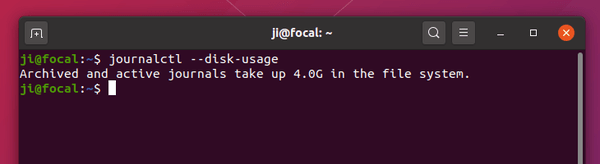
2. If you decide to clear the logs, run command to rotate the journal files. All currently active journal files will be marked as archived, so that they are never written to in future.
sudo journalctl --rotate
3. Now clear the journal logs by choosing one of following commands:
- Delete journal logs older than X days:
sudo journalctl --vacuum-time=2days
- Delete log files until the disk space taken falls below the specified size:
sudo journalctl --vacuum-size=100M
- Delete old logs and limit file number to X:
sudo journalctl --vacuum-files=5
4. You can also edit the configuration file to limit the journal log disk usage (100 MB for example).
Run command in terminal to edit the file via Gedit text editor:
sudo -H gedit /etc/systemd/journald.conf
When the file opens, un-comment (remove # at the beginning) the line #SystemMaxUse= and change it to SystemMaxUse=100M.
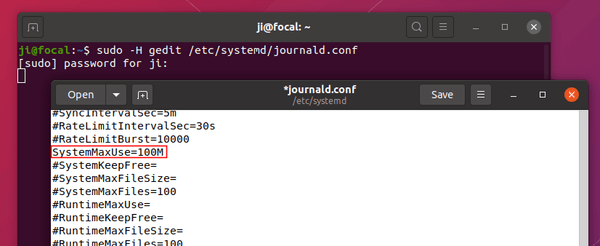
Save the file and reload systemd daemon via command:
systemctl daemon-reload
That’s all, Enjoy!