# Installationanleitung 2
1. The first thing to do is open a [command line](https://linuxconfig.org/linux-command-line-tutorial) on your Ubuntu system and execute the following `snap` command to install MicroK8s: ```
sudo snap install microk8s --classic
```
2. Then, execute the following commands to configure Ubuntu’s [ufw firewall](https://linuxconfig.org/how-to-install-ufw-and-use-it-to-set-up-a-basic-firewall) to allow communication between the Kubernetes pods and traffic to and from the internet to pods. ```
sudo ufw allow in on cni0
sudo ufw allow out on cni0
sudo ufw default allow routed
```
3. Next, add your current user to the MicroK8s user group so you have access to all of the necessary commands: ```
sudo usermod -a -G microk8s $USER
sudo mkdir ~/.kube && sudo chown -R $USER ~/.kube
sudo newgrp microk8s
```
4. The MicroK8s deployment only has the essential elements enabled out of the box. You can see a full list with the following command: ```
microk8s status
```
5. You can enable any number of needed services with the following commands. Enable all of the services that you will need: ```
$ microk8s enable dns
$ microk8s enable dashboard
$ microk8s enable storage
$ microk8s enable ingress
$ microk8s enable gpu
$ microk8s enable istio
$ microk8s enable registry
```
To disable any of these services later, just issue the same command but replace `enable` with `disable`:
```
$ microk8s disable dns
```
---
---
6. You can see the status of your services with the following command. They are ready to go once they switch to the ‘Running’ status: ```
$ microk8s kubectl get all --all-namespaces
```
[](https://linuxconfig.org/wp-content/uploads/2023/03/01-install-and-use-microk8s-on-ubuntu.png)Checking the status of services in MicroK8s on Ubuntu Linux
7. As we can see in the screenshot above, our Cluster IP Kubernetes dashboard is `10.152.183.38` but yours might be different, so be sure to check. We can now navigate to this address in our browser to access the web based dashboard. [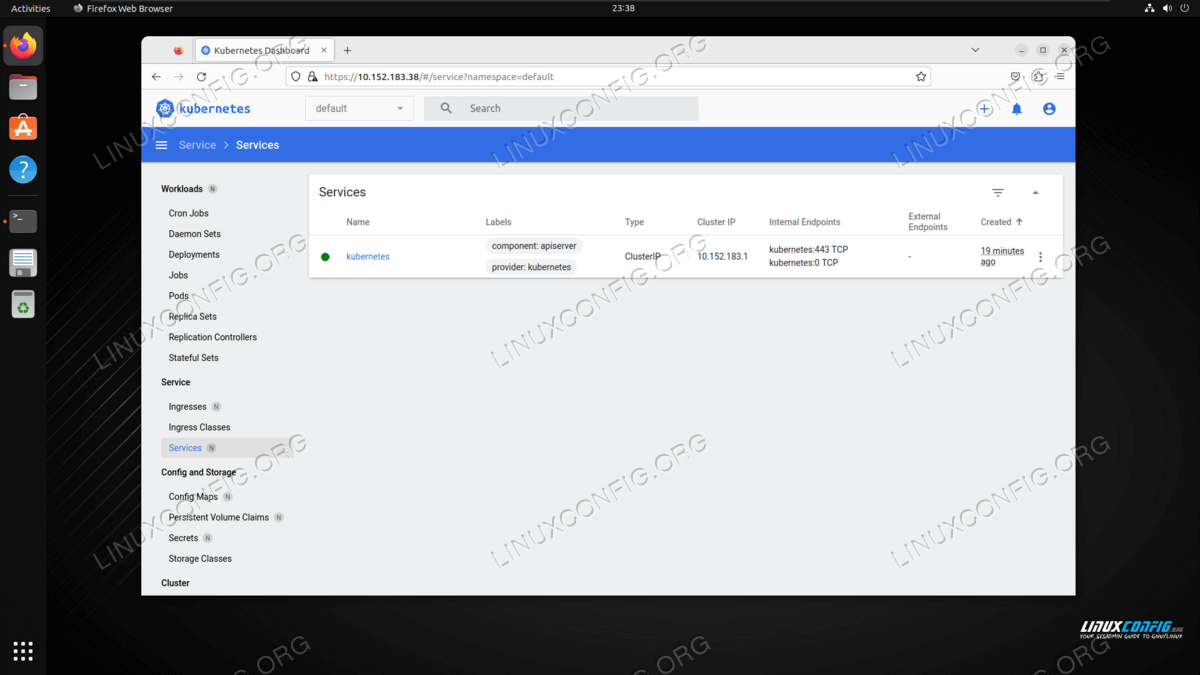](https://linuxconfig.org/wp-content/uploads/2023/03/02-install-and-use-microk8s-on-ubuntu.png)Accessing the MicroK8s web based dashboard in Firefox
8. To log in to the web based dashboard, generate a token with the following commands, and then paste it into login prompt in Firefox. ```
$ token=$(microk8s kubectl -n kube-system get secret | grep default-token | cut -d " " -f1)
$ microk8s kubectl -n kube-system describe secret $token
```
9. You can now get started with deploying your containerized application, or follow along with the three commands below to deploy, and expose a microbot service as an example and proof of concept: ```
$ microk8s kubectl create deployment microbot --image=dontrebootme/microbot:v1
$ microk8s kubectl scale deployment microbot --replicas=2
$ microk8s kubectl expose deployment microbot --type=NodePort --port=80 --name=microbot-service
```
10. You will see your new deployment in the output when executing: ```
$ microk8s kubectl get all --all-namespaces
```
11. To see all of the other MicroK8s commands available, you can use the `-h` option and view a full list: ```
$ microk8s -h
```
12. If, after your testing, you need to get rid of MicroK8s, you can execute: ```
$ microk8s stop
$ sudo snap remove microk8s
```