micro8ks - kubernetes
- Installation
- To install MicroK8s on Ubuntu, you can follow these steps
- To install the Kubernetes dashboard and set up HTTPS access, you can follow these steps:
- To automatically start the Kubernetes dashboard after booting your Ubuntu machine
- kubectl
- Change kubectl editor
- Dashboard WithOut Proxy
- Dashboard - TimeOut
- Dashboard Get Token
- To use a container registry with MicroK8s, you can follow these steps:
- Installationanleitung 2
- Dashboard
- Dashboard - enable-skip-login
- Dashboard - Remote Access
- Dashboard Get Token
- Docker Desktop Dashboard
- Deploying the Dashboard UI
- Creating sample user
- kubectl config
- microk8s - Registry
- Uninstall
- microk8s - Commands
- kubectl - Commands
Installation
To install MicroK8s on Ubuntu, you can follow these steps
To install MicroK8s on Ubuntu, you can follow these steps:
1. Open a terminal on your Ubuntu machine.
2. Update your system's package list by running the following command:
sudo apt update3. Install MicroK8s using snap, which is a package management system on Ubuntu:
sudo snap install microk8s --classic The `--classic` flag is used to enable classic snap confinement, allowing MicroK8s to access the host system.
4. After the installation is complete, add your user to the `microk8s` group so that you can run MicroK8s commands without using `sudo`:
sudo usermod -a -G microk8s <your-username>Replace `<your-username>` with your actual username.
5. To enable required permissions for your user, run the following command:
sudo chown -f -R <your-username> ~/.kube6. You will need to log out and log back in for the group changes to take effect. So, close the terminal and open a new one.
7. Verify that MicroK8s is up and running by checking the status:
microk8s status --wait-readyThis command will wait until all the MicroK8s services are running.
8. To enable some useful add-ons, you can use the following commands:
microk8s enable dnsmicrok8s enable hostpath-storage9. install Kubernetes dashboard, see nect page
To install the Kubernetes dashboard and set up HTTPS access, you can follow these steps:
To install the Kubernetes dashboard and set up HTTPS access, you can follow these steps:
1. Install the Kubernetes dashboard by running the following command:
microk8s enable dashboard2. Verify that the dashboard has been successfully installed by checking its status:
microk8s kubectl get services -n kube-systemLook for a service named `kubernetes-dashboard` in the `kube-system` namespace. Make a note of the port number (usually 443) associated with the service.
3. Generate a self-signed SSL certificate for HTTPS access. Run the following commands to create a directory for the certificates and generate the certificate:
sudo mkdir /var/snap/microk8s/current/certs
sudo microk8s kubectl create secret generic kubernetes-dashboard-certs --from-file=/var/snap/microk8s/current/certs -n kube-system4. Access the dashboard with HTTPS by creating a proxy using the `kubectl` command. Replace `<port>` with the port number noted from step 2:
microk8s kubectl proxy --port=<port> --address='0.0.0.0' --accept-hosts='.*'5. Open a web browser and navigate to
https://localhost:<port>/api/v1/namespaces/kube-system/services/https:kubernetes-dashboard:/proxy/Replace `<port>` with the same port number used in step 4.
6. You will encounter a security warning due to the self-signed certificate. Accept the warning and proceed to access the Kubernetes dashboard.
Please note that using a self-signed certificate poses security risks, and it's recommended to use a valid SSL certificate from a trusted certificate authority for production environments.
To automatically start the Kubernetes dashboard after booting your Ubuntu machine
To automatically start the Kubernetes dashboard after booting your Ubuntu machine, you can create a systemd service unit. Here's how you can do it:
1. Open a terminal on your Ubuntu machine.
2. Create a new systemd service unit file using a text editor. For example, you can use the following command to create the file with the Nano text editor:
```
sudo nano /etc/systemd/system/microk8s-dashboard.service
```
3. Add the following content to the service unit file:
```
[Unit]
Description=MicroK8s Kubernetes Dashboard
After=network.target
[Service]
ExecStart=/snap/bin/microk8s.kubectl proxy --port=8001 --address='0.0.0.0' --accept-hosts='.*'
Restart=always
RestartSec=10
[Install]
WantedBy=multi-user.target
```
This configuration defines a service unit for the Kubernetes dashboard, specifying the command to start the proxy and enabling automatic restarts.
4. Save the file and exit the text editor. In Nano, you can do this by pressing Ctrl+O, then Enter to save, and Ctrl+X to exit.
5. Enable the service to start automatically on boot by running the following command:
```
sudo systemctl enable microk8s-dashboard
```
6. Start the service manually for the current session by running:
```
sudo systemctl start microk8s-dashboard
```
7. Verify that the service is running without any errors by checking its status:
```
sudo systemctl status microk8s-dashboard
```
If everything is set up correctly, the status should indicate that the service is active (running).
After following these steps, the Kubernetes dashboard should start automatically after each boot. You can access it from any machine on the network by using the appropriate URL, as mentioned in the previous responses.
kubectl
sudo snap install kubectl --classic
microk8s.kubectl config view --raw > $HOME/.kube/microk8s.config
-kubectl config set-cluster microk8s-cluster --server=http://127.0.0.1:8080 --insecure-skip-tls-verify
ich habe stattdessen
microk8s.kubectl config view --raw > $HOME/.kube/configverwendet
kubectl config set-context microk8s --user=admin --cluster=microk8s-cluster
kubectl config use-context microk8sdie Datei auf einem externen Rechner kopieren:
scp USERNAME@HOST:/home/USERNAME/.kube/config configChange kubectl editor
sudo -H nano /etc/environment
insert new line: KUBE_EDITOR="nano"
Dashboard WithOut Proxy
Enable additional Add-Ons
We will need to enable a few additional Kubernetes add-ons to get this functionality up and running.
microk8s enable ingress # Ingress exposes HTTP and HTTPS routes from outside the cluster to services within the cluster.
microk8s enable dashboard # web-based Kubernetes user interface
microk8s enable dns # creates DNS records for services and pods
microk8s enable storage # provide both long-term and temporary storage to Pods in your cluster.
Enable Host Access
We need to alos enable one more additional add-on host-access to enable the access to services running on the host machine via fixed IP address.
We can enable to make use of the default address
microk8s enable host-accessEdit Kubernetes Dashboard Service
We need to edit the kubernetes-dashboard service file which provides dash-board functionality. To to edit this we need to edit dashboard service and change service type from ClusterIP to NodePort.
We use the following command to edit the file using vim.
kubectl -n kube-system edit service kubernetes-dashboardThis should open the contents of the file in vim and it should look something similar file below
You need to change type to NodePort
Once you save and exit the file K8s will automatically restart the service.
We can then get the Port the service is running by using the following command
Which should display something similar to the below and which we can see that the Dashboard is available on port 30536 in my case
Check Port
sudo snap install nmapnmap localhost -p 32061We can now open our Firefox browser on any workstation on our network and navigate to https://{server ip}:{port number} in my case it is https://192.168.0.35:30536
Get the token
We need to get the token from the server so we can do so using the following command in the server terminal
token=$(kubectl -n kube-system get secret | grep default-token | cut -d " " -f1) kubectl -n kube-system describe secret $tokenThis should return something similar too
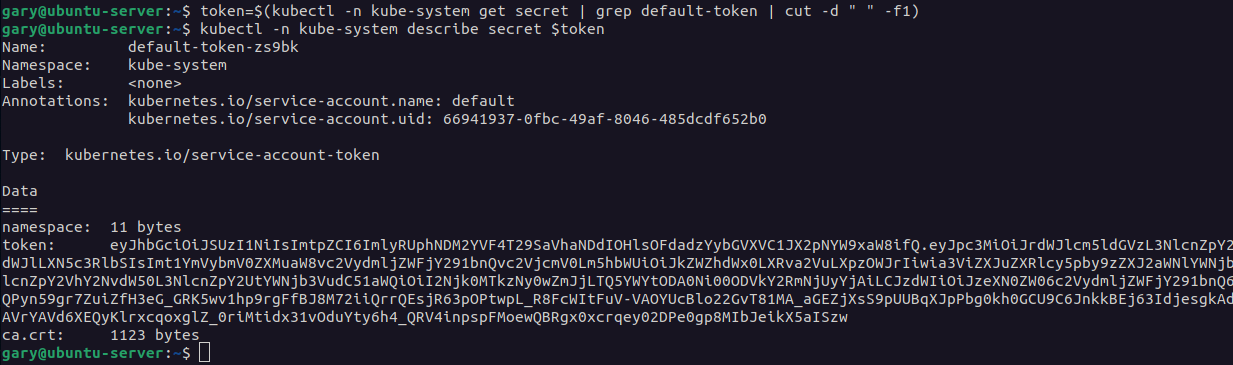
Copy the token text and paste it into the login dialog in the browser
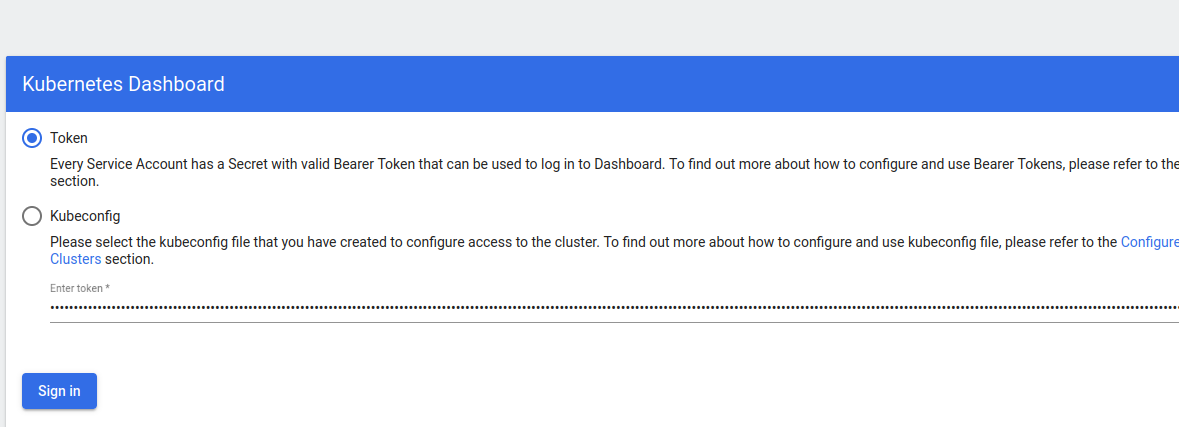
Then you should be able to login with ease.

Dashboard - TimeOut
kubectl -n kube-system edit deployments kubernetes-dashboard
- --token-ttl=0
spec:
      containers:
      - args:
        - --auto-generate-certificates
- --token-ttl=0 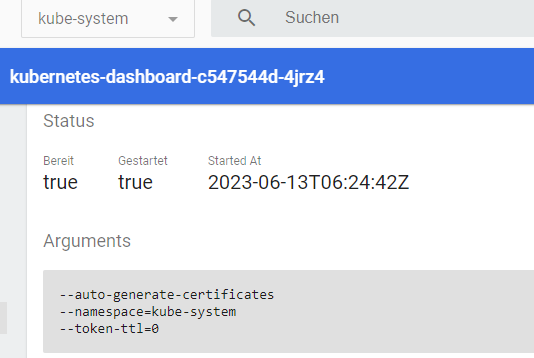
Dashboard Get Token
sudo cat /var/snap/microk8s/current/credentials/client.config
To use a container registry with MicroK8s, you can follow these steps:
To use a container registry with MicroK8s, you can follow these steps:
1. Enable the `registry` add-on in MicroK8s by running the following command:
```bash
microk8s enable registry
```
This command will start a local container registry in your MicroK8s cluster.
2. Verify that the `registry` add-on is running by checking the status:
```bash
microk8s status | grep registry
```
The output should show `enabled` next to the `registry` add-on.
3. Push an image to the local container registry. First, tag an existing Docker image with the address of the local registry. For example:
```bash
docker tag my-image:latest localhost:32000/my-image:latest
```
Replace `my-image` with the name of your image. The address `localhost:32000` corresponds to the default address of the local registry in MicroK8s.
4. Push the tagged image to the local container registry:
```bash
docker push localhost:32000/my-image:latest
```
This will push the image to the local registry within MicroK8s.
5. Use the image from the local registry in your Kubernetes manifests or deployments. Update your YAML files to reference the image from the local registry. For example:
```yaml
apiVersion: v1
kind: Pod
metadata:
name: my-pod
spec:
containers:
- name: my-container
image: localhost:32000/my-image:latest
```
Replace `my-image` with the name of your image, and `localhost:32000` with the address of the local registry.
MicroK8s will now use the local container registry for pulling images within your cluster.
Please note that the local container registry in MicroK8s uses port `32000` by default. If you encounter any issues or conflicts with this port, you can customize the port by modifying the `registry` add-on configuration.
By following these steps, you can enable and use a local container registry with MicroK8s to push and pull container images within your cluster.
To resolve this issue, you can configure Docker to allow insecure connections to the local registry by following these steps:
-
Open the Docker configuration file (
daemon.json) for editing. The location of this file depends on your operating system:- Linux:
/etc/docker/daemon.json - Windows:
C:\ProgramData\Docker\config\daemon.json - macOS:
~/Library/Group Containers/group.com.docker/daemon.json
- Linux:
-
If the file doesn't exist, create it.
-
Add the following content to the
daemon.jsonfile:json{ "insecure-registries": ["192.168.178.100:32000"] }Replace
192.168.178.100:32000with the IP address and port of your local container registry. -
Save the changes to the
daemon.jsonfile. -
Restart the Docker daemon for the changes to take effect. The procedure for restarting the Docker daemon varies depending on your operating system. You can usually do this by restarting the Docker service or using the Docker desktop application.
-
sudo snap restart docker.dockerd
Once Docker is configured to allow insecure connections, you should be able to push images to the local container registry without encountering the HTTPS error.
Installationanleitung 2
- The first thing to do is open a command line on your Ubuntu system and execute the following
snapcommand to install MicroK8s:sudo snap install microk8s --classic - Then, execute the following commands to configure Ubuntu’s ufw firewall to allow communication between the Kubernetes pods and traffic to and from the internet to pods.
sudo ufw allow in on cni0 sudo ufw allow out on cni0 sudo ufw default allow routed - Next, add your current user to the MicroK8s user group so you have access to all of the necessary commands:
sudo usermod -a -G microk8s $USER sudo mkdir ~/.kube && sudo chown -R $USER ~/.kube sudo newgrp microk8s - The MicroK8s deployment only has the essential elements enabled out of the box. You can see a full list with the following command:
microk8s status - You can enable any number of needed services with the following commands. Enable all of the services that you will need:
$ microk8s enable dns
$ microk8s enable dashboard
$ microk8s enable storage
$ microk8s enable ingress
$ microk8s enable gpu
$ microk8s enable istio
$ microk8s enable registry
To disable any of these services later, just issue the same command but replace
enablewithdisable:$ microk8s disable dns
- You can see the status of your services with the following command. They are ready to go once they switch to the ‘Running’ status:
$ microk8s kubectl get all --all-namespaces

Checking the status of services in MicroK8s on Ubuntu Linux - As we can see in the screenshot above, our Cluster IP Kubernetes dashboard is
10.152.183.38but yours might be different, so be sure to check. We can now navigate to this address in our browser to access the web based dashboard.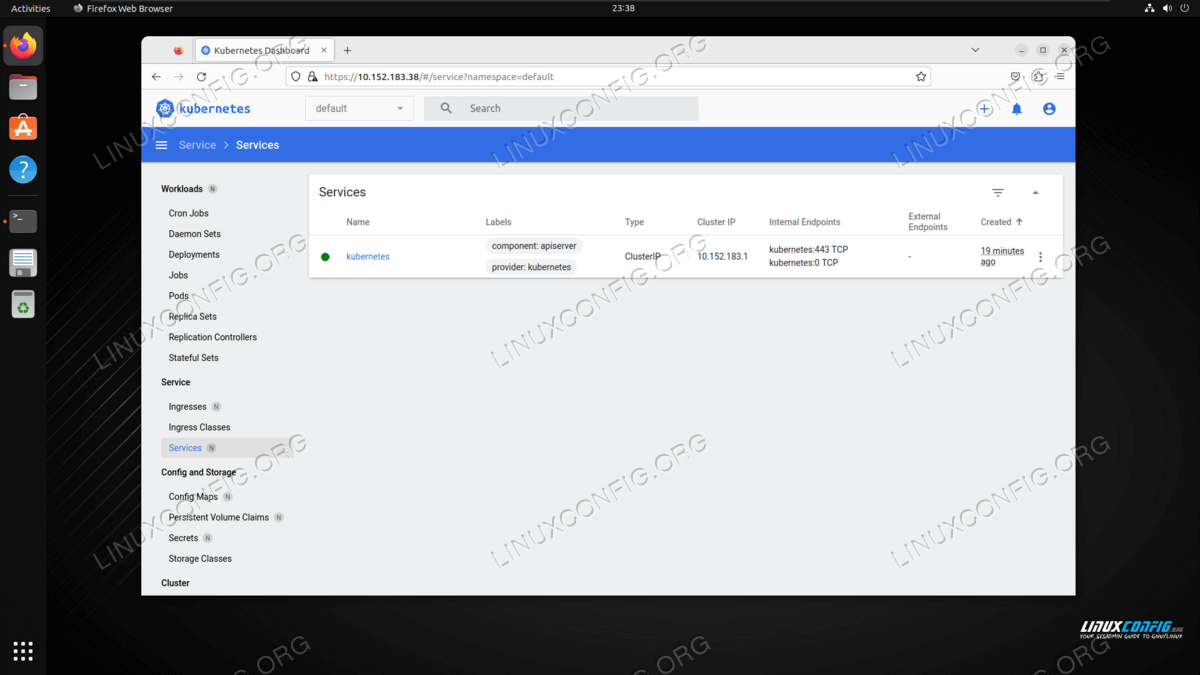
Accessing the MicroK8s web based dashboard in Firefox - To log in to the web based dashboard, generate a token with the following commands, and then paste it into login prompt in Firefox.
$ token=$(microk8s kubectl -n kube-system get secret | grep default-token | cut -d " " -f1)
$ microk8s kubectl -n kube-system describe secret $token
- You can now get started with deploying your containerized application, or follow along with the three commands below to deploy, and expose a microbot service as an example and proof of concept:
$ microk8s kubectl create deployment microbot --image=dontrebootme/microbot:v1
$ microk8s kubectl scale deployment microbot --replicas=2
$ microk8s kubectl expose deployment microbot --type=NodePort --port=80 --name=microbot-service
- You will see your new deployment in the output when executing:
$ microk8s kubectl get all --all-namespaces
- To see all of the other MicroK8s commands available, you can use the
-hoption and view a full list:$ microk8s -h
- If, after your testing, you need to get rid of MicroK8s, you can execute:
$ microk8s stop
$ sudo snap remove microk8s
Dashboard
Dashboard - enable-skip-login
microk8s.kubectl edit deployment/kubernetes-dashboard --namespace=kube-system
spec:
containers:
- args:
- --auto-generate-certificates
- --enable-skip-login
image: k8s.gcr.io/kubernetes-dashboard-amd64:v1.10.1
"/tmp/kubectl-edit-snu9z.yaml" 102L, 4077C
Dashboard - Remote Access
sudo crontab -e
@reboot sleep 60 && /snap/bin/microk8s dashboard-proxy > /tmp/dashboard-start.txt
Dashboard Get Token
sudo cat /var/snap/microk8s/current/credentials/client.config
Docker Desktop Dashboard
kubectl apply -f https://raw.githubusercontent.com/kubernetes/dashboard/v2.7.0/aio/deploy/recommended.yamlkubectl proxy
Erstellen und speichern Sie die folgende Definition als s.yml . Wenden Sie diese Konfiguration dann mit kubectl apply -f s.yml an
apiVersion: v1
kind: ServiceAccount
metadata:
  name: admin-user
  namespace: kubernetes-dashboard
Erstellen und speichern Sie die folgende Definition als r.yml . Wenden Sie diese Konfiguration dann mit kubectl apply -f r.yml an
apiVersion: rbac.authorization.k8s.io/v1
kind: ClusterRoleBinding
metadata:
  name: admin-user
roleRef:
  apiGroup: rbac.authorization.k8s.io
  kind: ClusterRole
  name: cluster-admin
subjects:
- kind: ServiceAccount
  name: admin-user
  namespace: kubernetes-dashboard
Führen Sie dann den folgenden Befehl aus:
kubectl -n kubernetes-dashboard get Secret $(kubectl -n kubernetes-dashboard get sa/admin-user -o jsonpath="{.secrets[0].name}") -o go-template="{{.data. Token | base64decode}}"
Fügen Sie das Token in den vorherigen Link ein, und Sie erhalten ein funktionierendes Dashboard für Ihren lokalen Cluster.
Deploying the Dashboard UI
https://kubernetes.io/docs/tasks/access-application-cluster/web-ui-dashboard/
The Dashboard UI is not deployed by default. To deploy it, run the following command:
kubectl apply -f https://raw.githubusercontent.com/kubernetes/dashboard/v2.7.0/aio/deploy/recommended.yaml
Accessing the Dashboard UI
To protect your cluster data, Dashboard deploys with a minimal RBAC configuration by default. Currently, Dashboard only supports logging in with a Bearer Token. To create a token for this demo, you can follow our guide on creating a sample user.
Command line proxy
You can enable access to the Dashboard using the kubectl command-line tool, by running the following command:
kubectl proxy
Kubectl will make Dashboard available at http://localhost:8001/api/v1/namespaces/kubernetes-dashboard/services/https:kubernetes-dashboard:/proxy/.
The UI can only be accessed from the machine where the command is executed. See kubectl proxy --help for more options.
Welcome view
When you access Dashboard on an empty cluster, you'll see the welcome page. This page contains a link to this document as well as a button to deploy your first application. In addition, you can view which system applications are running by default in the kube-system namespace of your cluster, for example the Dashboard itself.
Creating sample user
https://github.com/kubernetes/dashboard/blob/master/docs/user/access-control/creating-sample-user.md
In this guide, we will find out how to create a new user using the Service Account mechanism of Kubernetes, grant this user admin permissions and login to Dashboard using a bearer token tied to this user.
IMPORTANT: Make sure that you know what you are doing before proceeding. Granting admin privileges to Dashboard's Service Account might be a security risk.
For each of the following snippets for ServiceAccount and ClusterRoleBinding, you should copy them to new manifest files like dashboard-adminuser.yaml and use kubectl apply -f dashboard-adminuser.yaml to create them.
Creating a Service Account
We are creating Service Account with the name admin-user in namespace kubernetes-dashboard first.
apiVersion: v1
kind: ServiceAccount
metadata:
  name: admin-user
  namespace: kubernetes-dashboard
Creating a ClusterRoleBinding
In most cases after provisioning the cluster using kops, kubeadm or any other popular tool, the ClusterRole cluster-admin already exists in the cluster. We can use it and create only a ClusterRoleBinding for our ServiceAccount. If it does not exist then you need to create this role first and grant required privileges manually.
apiVersion: rbac.authorization.k8s.io/v1
kind: ClusterRoleBinding
metadata:
  name: admin-user
roleRef:
  apiGroup: rbac.authorization.k8s.io
  kind: ClusterRole
  name: cluster-admin
subjects:
- kind: ServiceAccount
  name: admin-user
  namespace: kubernetes-dashboard
Getting a Bearer Token
Now we need to find the token we can use to log in. Execute the following command:
kubectl -n kubernetes-dashboard create token admin-user
It should print something like:
eyJhbGciOiJSUzI1NiIsImtpZCI6IiJ9.eyJpc3MiOiJrdWJlcm5ldGVzL3NlcnZpY2VhY2NvdW50Iiwia3ViZXJuZXRlcy5pby9zZXJ2aWNlYWNjb3VudC9uYW1lc3BhY2UiOiJrdWJlcm5ldGVzLWRhc2hib2FyZCIsImt1YmVybmV0ZXMuaW8vc2VydmljZWFjY291bnQvc2VjcmV0Lm5hbWUiOiJhZG1pbi11c2VyLXRva2VuLXY1N253Iiwia3ViZXJuZXRlcy5pby9zZXJ2aWNlYWNjb3VudC9zZXJ2aWNlLWFjY291bnQubmFtZSI6ImFkbWluLXVzZXIiLCJrdWJlcm5ldGVzLmlvL3NlcnZpY2VhY2NvdW50L3NlcnZpY2UtYWNjb3VudC51aWQiOiIwMzAzMjQzYy00MDQwLTRhNTgtOGE0Ny04NDllZTliYTc5YzEiLCJzdWIiOiJzeXN0ZW06c2VydmljZWFjY291bnQ6a3ViZXJuZXRlcy1kYXNoYm9hcmQ6YWRtaW4tdXNlciJ9.Z2JrQlitASVwWbc-s6deLRFVk5DWD3P_vjUFXsqVSY10pbjFLG4njoZwh8p3tLxnX_VBsr7_6bwxhWSYChp9hwxznemD5x5HLtjb16kI9Z7yFWLtohzkTwuFbqmQaMoget_nYcQBUC5fDmBHRfFvNKePh_vSSb2h_aYXa8GV5AcfPQpY7r461itme1EXHQJqv-SN-zUnguDguCTjD80pFZ_CmnSE1z9QdMHPB8hoB4V68gtswR1VLa6mSYdgPwCHauuOobojALSaMc3RH7MmFUumAgguhqAkX3Omqd3rJbYOMRuMjhANqd08piDC3aIabINX6gP5-Tuuw2svnV6NYQ
Now copy the token and paste it into the Enter token field on the login screen.

Click the Sign in button and that's it. You are now logged in as an admin.
kubectl config
sample config file
apiVersion: v1
clusters:
- cluster:
certificate-authority-data: LS0tLS1CRUdJTiBDRVJUSUZJQ0FURS0tLS0tCk1JSUMvakNDQWVhZ0F3SUJBZ0lCQURBTkJna3Foa2lHOXcwQkFRc0ZBREFWTVJNd0VRWURWUVFERXdwcmRXSmwKY201bGRHVnpNQjRYRFRJek1EVXlNakEyTWpZME5Gb1hEVE16TURVeE9UQTJNalkwTkZvd0ZURVRNQkVHQTFVRQpBeE1LYTNWaVpYSnVaWFJsY3pDQ0FTSXdEUVlKS29aSWh2Y05BUUVCQlFBRGdnRVBBRENDQVFvQ2dnRUJBTmpXClRJeEZxTVJDOEdSdElsbXlHZVpNUEs4aVRYbGxhcFNJQSsvcEp2a0VkZzBMdWxkU0VoU1JDd1NrckpUVkJhZXMKMVQzYjR5WlEzSTZ1LzcvYTR3Qkt2eHYyVm4xM0kwZFJDTy8zNHUwdk82cHdoZi9wK3Q3bUJKUENoeGx0cWZJegpFalZZbzErTFZ5MVJjamY3ZjhDNWppQThlQlNmYUNrRGFnR012a1FMcndCR1o1UlNiTjJuUGVkWG4zZVhoTVVTCm5xTkhUYVhpVnRyZkxpNDNFbkhFUVBGVlR1RCtRSGVJR212aVIrVG9aYWNDVWVCUHM0RlY4ZE55SzJoMmYvSisKcjF3MlJmV1VvQk51UXg0c1hyQUYraTNvMEdQUnNrQTBrWnpEMTROTEk2MDlsMTVWRXVDSUNFUkZ0c1oxNFRkbgpDL0RWNzZ0cXBnTnJLSTNUNVNVQ0F3RUFBYU5aTUZjd0RnWURWUjBQQVFIL0JBUURBZ0trTUE4R0ExVWRFd0VCCi93UUZNQU1CQWY4d0hRWURWUjBPQkJZRUZQcmozQzRmbTJjV3BaWXo4WWFUNEd5QzFlQ0pNQlVHQTFVZEVRUU8KTUF5Q0NtdDFZbVZ5Ym1WMFpYTXdEUVlKS29aSWh2Y05BUUVMQlFBRGdnRUJBSFFPUitNK0RReEdTRzcrcWRBOAowdTdQem5YVVR1RWdtRDRPam9lWFVvZUJnVzRpZGxGck8xYlVLVlRueTk1a0dubGRGRW9Md1Q5OFdHWktnMDZ6CnB6S0pPSVdGdDB5SnptSTMrT3NQYmdqa05CUUhYQzljZzg2YUNCa0RrNkNpanRsWkxtS0NLNGZZVFlwU2ZUTGcKQkF6aktlcXlQcHpqejdpRDNZa1dQM2ZDV0pGNXNVRllrMHBpUzJTQi9ORHMvYno5WEFxMUcwMGZMd3Q3NFU5MApNR3JYYVhNajdXWVVOWjFtZnI5elJ5dDFwTzdSZUw5MlpVNVZHcHhRVmpPK3VFQ3hyT1E4K0NCYmJGSlgzM2ZZCmx2VW9scXFXZ2RITnY1anpsTjEwdVdCYnhSRU5NNUxIREEvb3QzZTJGbDVyOHZUM3I2TG1UeXBZVFFmZ0RBRkgKMUdFPQotLS0tLUVORCBDRVJUSUZJQ0FURS0tLS0tCg==
server: https://kubernetes.docker.internal:6443
name: docker-desktop
contexts:
- context:
cluster: docker-desktop
user: docker-desktop
name: docker-desktop
kind: Config
preferences: {}
users:
- name: admin
user:
token: Z3ZpbksyL1I4TVBCU1BNN0ltS0J2cHR2YkZkQ2RDcXlkQXVrWnJOYU9hcz0K
- name: docker-desktop
user:
client-certificate-data: LS0tLS1CRUdJTiBDRVJUSUZJQ0FURS0tLS0tCk1JSURRakNDQWlxZ0F3SUJBZ0lJS3RVTHFDYlkyK1l3RFFZSktvWklodmNOQVFFTEJRQXdGVEVUTUJFR0ExVUUKQXhNS2EzVmlaWEp1WlhSbGN6QWVGdzB5TXpBMU1qSXdOakkyTkRSYUZ3MHlOREExTWpFd05qSTJORGhhTURZeApGekFWQmdOVkJBb1REbk41YzNSbGJUcHRZWE4wWlhKek1Sc3dHUVlEVlFRREV4SmtiMk5yWlhJdFptOXlMV1JsCmMydDBiM0F3Z2dFaU1BMEdDU3FHU0liM0RRRUJBUVVBQTRJQkR3QXdnZ0VLQW9JQkFRQ3pmOFVSMGtQeGVvTWcKdlFHaDY4YVVJMmRIWXNpVEk2bndIUVJGQ0dzT2x0bmFEb1llK2xPMHJrcWM1ZXhwZU5hT0d0dktNODY3dXFsYQpoVVlOc2NUL3lkbWhENzlCa01XTnc4OXR1OC8yNFFYb01oanlKcDE4QlRUOU9CV01kWXZ6MHl4cmd4cnBFc2NBClpOeE5uVjFUMDFhWmE4aVYwZWFQOWhIQUxmVitqUjhWWjhWdy9aVEwzaHMzakswZUcxOU92RnJKeFpVYzZTMEEKWVV3UDBOVjF4VUhwR1VQQjdyRUxDU3RSZEhzcGVEL3JxQXQwOS9IQ3lsR0Y0eUJMZ1o2L3I0OVRrUXhiRUJTNQpMaHRLQmNvd0xaZmZxSlRUbXBYeU1McHIyVyswOHd1K08ySlZBZnh6MGQxRUpFb1hIditzUW1XTVJ1MkhrUGo5CnFZdzVsTGR0QWdNQkFBR2pkVEJ6TUE0R0ExVWREd0VCL3dRRUF3SUZvREFUQmdOVkhTVUVEREFLQmdnckJnRUYKQlFjREFqQU1CZ05WSFJNQkFmOEVBakFBTUI4R0ExVWRJd1FZTUJhQUZQcmozQzRmbTJjV3BaWXo4WWFUNEd5QwoxZUNKTUIwR0ExVWRFUVFXTUJTQ0VtUnZZMnRsY2kxbWIzSXRaR1Z6YTNSdmNEQU5CZ2txaGtpRzl3MEJBUXNGCkFBT0NBUUVBR1AxbW9YUDg2c2xiMHgzT0VneFRidFFMV0FYYjExRjZDQmF6TThNRW5wd3NDMHlqcWJoK1JIS2cKekdSZXpIM0oyV1JMbVJCOWRkZXBRNTFtZDRRVHZRTmxEd2FXbkU1TGpLZzhjVHA2bmZieDNFamdjRkRYNFVIWApvanY4QUF1SzlPNWZNamJSOHNGZFJpZVNGZEFQNXhuMy82RkRMaWNDOTU4S3djVTNnQXl0RlNtYXpnaUxQaDBwCm5iNzYyTmt5TUNLd1JiZ01FMDFPeEtjWWFzYUpWaFhYYlBMa0NCT0cxUHBuOVZXd293d2NMNk9BcXRybzdpSG8KcHRaVi8rajFiTlZwbmF0Y1hGU2tXUkk1SWFINysvUDNiMTJuVk4zckFaT3JycjRtajVGYXpQNTNkRlVOUktiRwpDNEVjVW1USzE4WnQramRCampVTEEzK2EvdkxBV1E9PQotLS0tLUVORCBDRVJUSUZJQ0FURS0tLS0tCg==
client-key-data: LS0tLS1CRUdJTiBSU0EgUFJJVkFURSBLRVktLS0tLQpNSUlFcFFJQkFBS0NBUUVBczMvRkVkSkQ4WHFESUwwQm9ldkdsQ05uUjJMSWt5T3A4QjBFUlFockRwYloyZzZHCkh2cFR0SzVLbk9Yc2FYaldqaHJieWpQT3U3cXBXb1ZHRGJIRS84blpvUSsvUVpERmpjUFBiYnZQOXVFRjZESVkKOGlhZGZBVTAvVGdWakhXTDg5TXNhNE1hNlJMSEFHVGNUWjFkVTlOV21XdklsZEhtai9ZUndDMzFmbzBmRldmRgpjUDJVeTk0Yk40eXRIaHRmVHJ4YXljV1ZIT2t0QUdGTUQ5RFZkY1ZCNlJsRHdlNnhDd2tyVVhSN0tYZy82NmdMCmRQZnh3c3BSaGVNZ1M0R2V2NitQVTVFTVd4QVV1UzRiU2dYS01DMlgzNmlVMDVxVjhqQzZhOWx2dFBNTHZqdGkKVlFIOGM5SGRSQ1JLRng3L3JFSmxqRWJ0aDVENC9hbU1PWlMzYlFJREFRQUJBb0lCQVFDdlF4UXlvSEdDdUxLTQpKc0FQVDkxbkMySnVTeis0bTF2MGZRQ01Qdm41RnNYRHFlYS9ISURhckV0aUF3WGd2Z0lRWXAwMFEzMlp3MXBVCmJrakdXa3NWemdyV3ZqOXFUMmIxVXJtWVZZZHJjSytKMWxDUkw2OFpSeVJFRXB6SHRvWmVIbFVDN05JN3ZQL2QKbkoyV2t3NXJLTEVud0J2c1hUU1lZQlZZNWdjTDlqQkM5OW9HWFA5T0F5ZmwzT3p2R2tzT0tvMVlVUkJsZ1A2YQpRN2xnSUZGNnJ2ZnA5ZUpHSzIwQ3NoYVQzb2xHbjlXc0p2WUYrbHZPWVFZeko1cFlTUmVyUDUxTWpma2JSUzRJClE2cGFNNGN2OWNOSmhYQThpbnFSNE10YmFhV21xVVUxd2RSdUdLblR4RDFtOW02Ylh5NURyUW5ZZXlwcU9xUW4KMko0SWU1WHBBb0dCQU5VL1diSmxPbVlpbnJ0NFkzdUJ6a2FPN3lVMFIrdlVZSU1ScTZIR295cG1RUEpYdGpmRgowZUxsZ05XWUFyQnFmNDVPK0xJNyt6VExGdUw5YXBKejNBY1dveElGajdieE1OeDc3a2pyUUlrVDBVbEllZXlHCkJoYVpjZDYwcFA0R0lqeTJ0UmZrSnFoL1ErWUdFZTJMb2VXeHNYRm9laElEL1pwQW1tNzh5Nk1QQW9HQkFOZDgKVkJqdERyczlNbU5xUzk0Mm9lS2lpdWVvQXhwdlMxbUwvelREbTFPdzRsOEJzWGxnc0g3Z3M0OStXOXNndmdjRwpnOVE2NWVVOEkrazVPakcvbU9zckJCWUNCUzhBcVpEcldZYjlydyt5ZGRGbjVtUWYzYlppeGczd1REby92UllOCmFNb1gxSmxsZStMajlsblJObUZBSDdiQmxMRndGSlNxUEt4KzFFM0RBb0dCQUxRSVBORFlsM29jNWtlOWRyZVIKdWpWbGZNNjdHYkVtNXFnaEpmWjVmYzFROEtub2xTVDI5S0NMUTc2UURFMG1URFEzeGN5cnlRUWtKVmxUdTBLVApZQUg0QVlvNGVjRm9WT2tBRkFjcDNaMGN4d2NJa2k2Mlk3TjJybVRudTVmZVU4OVFMUWxUaTdPYlpoWnZyM2tOCjlvdTEvZW1SMitVVHkyb0wrcFdUQk5UUEFvR0JBTDY1Umw0QmcrWnAxZTEwS2M1Mm9IWk4wNUFTZnh5b29SS1MKL01FZzJKd01sVy90dWIxcXZReXZxWDQ2SXVjaVpjOG1Ed3lMVE92R2ZTcHlBbllCMVVGZ2cyOVBQbk5Kck11ZAo0MUc5dTNLelMrQ2FpNnJYSVkvS2dPM1pZRDYySjVBYk1rS2RNUWpNY0FoMEtKbDZ1UnorZXBOeFowQmRxWG1qCjY2dnBYZE90QW9HQVlyT3JXYTlmNURER3BCTVFoTU9nTEZ6TXZ0Mys4d1ZibmV3Q0MzbGxyckdpTG5ub3RGOFQKQzlPb0crWjNoejQrdG4vS3lxV2UwbW42bEhLSURRNXBzdTlaMEl0L3c3T1ByYnVoS01jcUZRaWMzRnd5T0szdgpTdGR4SmpUZ1lLSlJTT2kyWFNPTWlGWGRmWjFDUkVoblNXZVg5Z2hpbDVBMHozMW50SllWQnBVPQotLS0tLUVORCBSU0EgUFJJVkFURSBLRVktLS0tLQo=
current-context: microk8s
apiVersion: v1
clusters:
- cluster:
certificate-authority-data: LS0tLS1CRUdJTiBDRVJUSUZJQ0FURS0tLS0tCk1JSUREekNDQWZlZ0F3SUJBZ0lVTS9TOVFpWW9ZSHI0TFphNFoyVkIxUjc4UTFRd0RRWUpLb1pJaHZjTkFRRUwKQlFBd0Z6RVZNQk1HQTFVRUF3d01NVEF1TVRVeUxqRTRNeTR4TUI0WERUSXpNRFV4TlRBNU1UY3lNMW9YRFRNegpNRFV4TWpBNU1UY3lNMW93RnpFVk1CTUdBMVVFQXd3TU1UQXVNVFV5TGpFNE15NHhNSUlCSWpBTkJna3Foa2lHCjl3MEJBUUVGQUFPQ0FROEFNSUlCQ2dLQ0FRRUFxVW9ScUxubWp5YUJRb1NpQTNpMGRQdlArVExaVTM2cm9Bc3gKcnI5V3cweWNTUzgwcFl0a2VNcld5akRtczJZZ0UraTljb25YdTc0TkYxOEJjbXZUR2U4eXJ2aTZleUE0L2NRKworMGwwcDI3cTlkV0lNMC9lc1YwSVVtYmNMblVpTW15am0zRm1nYURvNWhMQm9mcVdTNHRmQkdOcFFQRDE2ZWIrCmcvcDJHS3cxTHlJUCtOWGFDWWdGMUZaRUs0UlkxQ0ROT0tNTVFpR0Q3cFlJUXlVbjdVZGNXSXN1WThwaklyTTIKU2gvak0yaTkyT0l4VjlqVjZzVW5VczNheW93dEhGbHM1T21PN3VNUjNRc2VOWm9pUDEvMkhVYUx2ei9pMEt3RwpqNENVL1NUVVIrRldEdzlmWXBwblZSbDN1MkhVTkoyRUE3Wkh5d1FuVkZad1Nnckhzd0lEQVFBQm8xTXdVVEFkCkJnTlZIUTRFRmdRVUJrQWlRVzJSQmZaYlE1ZGdyV3pma0ZLR3VWa3dId1lEVlIwakJCZ3dGb0FVQmtBaVFXMlIKQmZaYlE1ZGdyV3pma0ZLR3VWa3dEd1lEVlIwVEFRSC9CQVV3QXdFQi96QU5CZ2txaGtpRzl3MEJBUXNGQUFPQwpBUUVBbEhBS1NDVGhKRGgwUHNjMTIvWlBmc3AvaStLUEkvaHpXR1IxeXB2ZUU0NFY3R3ZPcHlSVTJIWGFhanJaCmhldkpwb0xwYy9XZzhwZ2Rid011MVdZcTRXVEJkTjQ1N1NoL0ZGUkxmL2FoNnJ3RVVIbHEwMkJaYUNsZGNCNTkKSWpjNmtJVlpnblRUcGx6MnVQMzRkckVMdFUzVTlYeVBYZFRyVGpuVkFvN2dSTFRlUEVKNG9NYXI2dXRyVk9TWQpnbXF0OHJyZXFRa2dIOVAxSGlPbm83c0VTOUtXemZoTnEyZVQ1ZHdsMWNvLzJ0MlZ2WTd5elhnek5POVdBRkZwCnAwRXFGa2c3RTJPMmxyUzNNVzlScEMveDBXQ3dYQzhHSVNFSnFwTmN6bU1PVXQzNUJqVU9Sc3NLdU5zRE4zejUKYnhmbzI5bFpuUlk1ZkQvYlJ1UnQ5L2c2SVE9PQotLS0tLUVORCBDRVJUSUZJQ0FURS0tLS0tCg==
server: https://192.168.0.115:16443
name: microk8s-cluster
contexts:
- context:
cluster: microk8s-cluster
user: admin
name: microk8s
current-context: microk8s
kind: Config
preferences: {}
users:
- name: admin
user:
token: Z3ZpbksyL1I4TVBCU1BNN0ltS0J2cHR2YkZkQ2RDcXlkQXVrWnJOYU9hcz0K
kubectl change context
kubectl help config
kubectl set-context XXX
kubectl cluster-info
microk8s - Registry
Registry Cleanup
microk8s disable registry
microk8s disable storage:destroy-storage
microk8s enable registry Registry - Commands
http://192.168.0.115:32000/v2/_catalog
http://192.168.178.100:32000/v2/_catalog
kubectl get svc -n container-registrymicrok8s.enable ingressDelete more images by Name
microk8s ctr images rm $(microk8s ctr images ls | grep 'IMAGENAME')
Uninstall
deinstallieren
microk8s.disable dashboard dns
sudo snap remove microk8s
oder
sudo snap remove microk8s --purge
Sollte eine Fehlermeldung mit ..unlinkat.. erscheinen dann neu booten,
sudo snap remove microk8sdanach sollte es weg sein
microk8s - Commands
Funktionstest
microk8s statusmicrok8s kubectl get services -n kube-system$ microk8s kubectl get all --all-namespaces
Secrets erstellen
Version1
kubectl create secret generic SECRETSNAME --from-file=FILENAMEVersion2
kubectl create secret generic SECRETSNAME --from-file=.FILENAME --dry-run=client --output=yaml > SECRETSFILE.yaml
kubectl apply -f SECRETSFILE.yaml
kubectl - Commands
Get a Shell to a Running Container
kubectl get podkubectl exec --stdin --tty PODNAME -- /bin/bash